Showing posts with label Campaign. Show all posts

Thursday, 18 September 2025

Solo Campaign - Seven Years War


I want to design a set of wargame rules for running solo campaigns and their component battles. Before diving into the design, I thought it best to stand on the shoulders of giants and learn from those who have gone before me.

To that end, I created a solo wargame campaign focused on a segment of the Seven Years’ War (1756–1763). I anchored the campaign timeline and movement using Bob Cordery’s Snakes & Ladders Campaign System from The Portable Wargame Compendium. I then resolved individual battles with the Dominion of Frederick the simple rules from Ork Publishing.

Although both the Snakes & Ladders system and the Dominion rules are heavily dice-driven—running counter to my instinct for hands-on control—they allowed me to play a solo campaign (October 1756–June 1757) in under two hours. That speed is an asset: I can replay the entire campaign multiple times in a single afternoon to test different outcomes.

The lessons learned from this solo-campaign experience will guide me as I craft my own rules. I plan to consider the best elements of these existing systems with a more active role for myself as the commanding general.

 Campaign Map

The “snakes & ladders”  delivering the campaign sequence fits on a single side of A4 and will be familiar to anyone who has played “Snakes and Ladders” as a child.  The Prussians start on the first square at the bottom-left of the page called “Start invasion of Saxony 1756” and then roll a D6 to progress through the campaign, going up blue arrows and down red arrows if a move ends on that square.  Stop when moving on to a battle square regardless of any unusual movement.  The battle is then fought and if won the Prussians advance along the green arrow and if lost movement recommences on the next square.

 Battles

The battles were fought using the “Dominion of Frederick” rules using the troops listed for each historic battle in the rule book.  The battle of the Saxon army blockaded at Pima is not historical as the Austrians were unable to relieve the blockade before the Saxon’s surrounded to Fredric the Great.  For this battle I used the troops from the example battle in the rule book.

Campaign rules

The results of each battle do not stop the Prussian progress towards the “Battle of Koln” .  I gave the winning side of each battle a +1 on their rally roll in the subsequent battles.  My justification was that the moral boost of winning made it easier for a general to rally a defeated unit.

The campaign played out as follows:

The Prussians advances swiftly and without incident to battle at Prima.  The battle was a resounding victory with few Austrian losses.

Enthusiastically advancing to battle at Lobositz the Prussians suffered a stinging defeat from the Austrians under von Browne.

Not allowing themselves to be disheartened the Prussians pressed on to steal a victory  they had no right to win  at Reichenburn.

The arrival of fresh supplies allowed the Prussians to bypass battle at Prague and arrive at Kolin for the very closely fought final battle of the campaign.  Victory was won by Austria and the Prussian menace was defeated…for now.

Resources

Thoughts going forward

Thoughts going forward on the campaign map (view)

  • Fill in more text in boxes and add more red arrows that are skipped by winning a battle.
  •  Add some impacts to the armies from blue and greed arrows such as gain or loose an army point.
  •  Add some way to influence the progression around the Campaign trail; e.g. allowing a plus/minus one square that is earnt by winning a battle.

Thoughts going forward on the Dominion rules (view)

  • I’m unconvinced that Cav should have +1 v Line Infantry as they already have a one point advantage over infantry.  My understanding of the period was that Cavalry did not fare well against formed infantry but rather fought the opposing cavalry and then attacked the flanks of unsupported infantry. In future games I’ll drop the +1 mod for Cav v Inf .
  • In this period line infantry defended well against cavalry so I’ll allow all infantry that are attacked a +1 against cavalry but infantry attacking cavalry will not get this advantage.

 Thoughts going forward with solo campaigns

  • The speed was very good but I’m willing to go slower if it allows me more input into strategic decisions.
  • The speed of the battles was good, but I’d like to add details such as terrain etc.
  • For my next solo campaign I'll use the 3x3 Portable Wargames rules and I might also try the DBx rules as they will both allow more control over the battles although at the cost of requiring more time to resolve.
Please get in touch with any thoughts or feedback.


Saturday, 11 April 2020

Battle of Prague, South Flank - 05 Jun 1757 - Blucher

I've always liked the battle for Prague in the Seven Years War, the sides are reasonable even and the south flank of the battle had both a  great cavalry battle and a fight for a town. What better way to spend a Easter weekend in isolation  than fight a solo re-enactment in 6mm using modified Blucher rules?

As I was using Blucher I could have refought the whole battle on my 6' gaming table using the Blucher scale of one unit representing a brigade.  However I did this a few weeks ago and thought I preferred the idea of seeing 5 regiments of cuirassiers and 2 dragoons facing of against 4 cuirassiers and 4 dragoons with another 12 regiments in reserve.  The sight of 28 cavalry regiments (bases) was just going to be much more fun than 10 brigade (bases).

I don't a big enough table to fight the battle at 1 base per battalion scale but the south end of the battle field was the interesting end anyway.  I therefore went with about 40 units per side representing the south end of the battlefield.  Click here for the unit list.

As I was playing solo I decided to use some Blucher Solo rules which were recommended to me on the Blucher Facebook site. The called for me to play the defending side and to keep to my half of the battle field while the  AI ran the attackers, Prussians in this case.


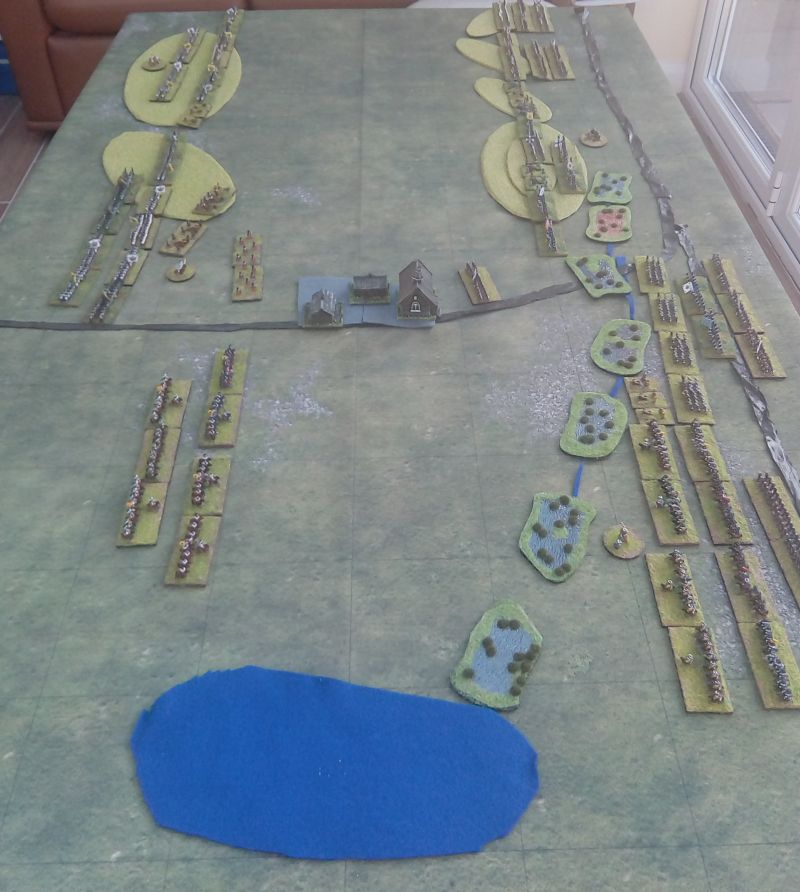
A view of the battlefield looking north.  Lake Zinten is in the foreground and the string of marshland and fishponds run up the right flank.  The village of Sterbohol in the centre. The Austrians are on the left (west) and the Prussians on the right (east).

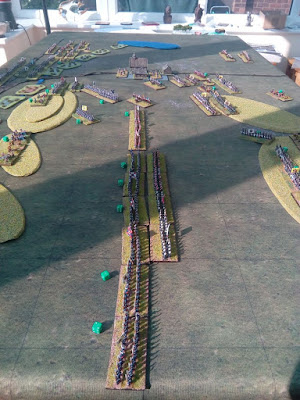
The AI divided the battlefield in to three sections (right, centre and left).   My choice would have been to start the attack with the Prussian left flank however the AI opted to lead the attack with the Prussian right flank. (Sorry about the shadow in the picture, it was a sunny day.)

Twelve battalions of Prussians marched forward, flags flying and drum beating...straight in to the teeth of the waiting Austrian volleys.  


The Austrian resistance was strong and the AI called for a general retreat and the Prussians came back worse for wear.  


The AI's next plan was a central assault which did ok but wasn't going to win the battle. The Austrian cuirassiers bounced off the Prussian Musketeers a few times but wore themselves out.


The centre attach wasn't getting very far until the Prussian reserves arrive on their left flank. Forty squadrons of Hussars and five squadrons of dragoons (9 units).

The Austrian right flank cavalry were just about to get worried when the Austrian reserves turned up on the same flank and a huge cavalry battle ensured.  About 26 cavalry regements, roughly 130 squadrons.


The Austrians just managed to win.  Mainly due to the Prussian cavalry reserve being mostly hussars (light cavalry).  If the Prussian's  had battle cavalry the outcome would have been different.  As it was the Austrians managed to drive off the Prussian hussars and shake their infantry out into a line.


Meanwhile the AI decided that things were not going well in the centre and rather than call a retreat it  had a new infantry battalion appear in the centre and a cuirassier regiment appear on the flank of the Austrian forces in the centre. (Must have been hidden in the smoke).

Alas too little, too late and the game had reached turn 30 and therefore the end of the day.  The Austrians won as the Prussians were not able to defeat them.  Yay for me!   But wait the battle was in June, there would have been more daylight...I decided to fight on 5 more turns.  Which was not good news for the flanked Austrian troops in the centre.

The battalion in the bottom of the picture below is an Austrian musketeer battalion hit in the front and flank by two Prussian cuirassier regiments!

The battle went down hill very quickly after that, from the Austrian point of view.  The entire centre was smashed and the battle field split into two.  It was at this point that I realised the Prussians has won in the last turn by taking the Austrian army to their break point.   

In the view of the south end of the battle field below you can see the Prussian left flank and Austrian right were still battling on although with heavy casualties but the centre is bare except for Prussian units.

I had been defeated by an AI!  How sad to be unable to win a solo game :)

Sunday, 8 September 2019

Boudica Campaign

07 Sep 19

I'm relatively new to "To The Strongest" (TtS) and up to now I've been playing with various substitute figures while I get the feel for the rules and various armies.    After a lot of painting and basing I've build up both early Imperial Romans and Ancient British armies.  (I've also created Sarmatian army for a future Dacian/Sarmatian wars with Rome project.)


I decided to start off as I mean to go on and dive straight into a linked battle style campaign as opposed to one off encounter battles.  Rather than a complicated system of off table map manoeuvres and supply management, the campaign is a series of linked battles intended so that each can be played with any number of points/players.  There is in a minor bonus to the loosing side to give them a boost in the next battle.

The campaign rules can be downloaded here.

The first Battle
Coordinating a number of players proved a challenge due to holidays etc, so I decided to kick off the campaign  with a 1:1 battle with my friend John.  The battle was fought on his large 12' by 4' table, so with 10cm boxes the battlefield was 24 boxes wide. No secure flanks! Just how it should be.

The forces on each side were 4 commands with a total of 170pts each.


  • Praefectus castrorums - Tulius Octopus
    • 3 Veteran  Legionaries cohorts, 
    • 1 veteran Bowmen 
    • and a camp with Camp servants.
  • 1st Tribuni 
    • 4 Cohorts of Legionaries.
  • 2nd Tribuni 
    • 2 auxiliaries & 1 veteran cavalry.
  • 3rd Tribuni
    • 2 auxiliaries & 1 veteran cavalry.
  •  Iceni Chieftain - Eóin Dalta
    • 2 fanatical bands of warriors
    • 3 bands of warriors
    • 1 band of sling armed youths
    • and a camp with Camp followers.
  • Iceni Scouts
    • 4 light cavalry
  • Trinovantes Chieftain
    • 5 bands of warriors
    • 1 band of sling armed youths
  • Trinovantes Scouts
    • 4 light chariots

The scenario called for an ambush by the British which means each Roman unit had to test to see if it was disordered. Almost the whole roman command turned out to be disordered.

The British advanced but the cowardly Trinovanties warriors held back fearful of the Romans.

Despite being disordered the Romans advanced planning to deal with the Iceni warriors before the Trinovanties  found their nerve, intending to address their order as they advanced.


The Trinovanties light chariots were maned by braver warriors than their foot and charged recklessly across the battle field, flanking and enveloping the Roman right wing.  I was amazed to see 4 light chariots destroy 3 roman units for the lose of just  2 chariot units.

The Roman left followed the battle plan and broke the Iceni Cavalry and the slingers, driving them back and killing three out of four.


The centre was where the battle was going to be won or lost.
The Roman veterans destroyed the Iceni warriors.  However the overall battle was close. The Romans had 2 VP left and the British 3 VP.  The Romans had a three cohorts try to destroy one  double disordered warrior warbands but failed every time.

The Trinovanties shamed by the fearlessness of their light chariots charged across the battle field and slammed into the Romans with little to no effect.  

The victory looked to be Roman but then one of the light chariot units slipped around the woods and into the flank of a disordered veteran legion and rode Rome's finest into the ground.  
VICTORY for the British!!!  17 VP taken  to 14 VP lost

After Action Report by Tulius Octopus, Roman Commander
We was robbed...I was distracted trying to buy tickets for the circus and allowed myself to get over confident.  Those British Light chariots and cavalry were far more dangerous than I expected.  A more compact formation with stronger flanks would have been a better formation.

The Ninth legion are on their way north and will crush the British in the next battle!.

The Game
It was a fun battle.  I was commander of the defeated legions and my friend John the victorious British.  It was a very close battle with both of us just needing to destroy one unit to gain victory.  It was the first time we remembered to check for Generals as casualties and the loss of the Roman commanded on the right wing was a blow.  I made a mistake in the rules telling John that Light troops could not charge the front of formed heavy troops but allowing him to charge the front of disordered heavy troops.  To be honest I don't think it would have changed the result of the battle. His light troops were running rings around my flanks.

The Warriors did seem weak compared to the Roman legionaries but we have a few more battles to test this theory.

The next battle is the encirclement of the IX legion and the Romans will have 3 extra heroes.