Wednesday 29 September 2021

Mollwitz 1741 – Twilight of the Soldier Kings


1st Silesian War

War of the Austrian Succession


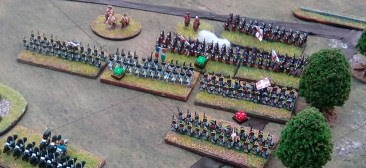
The Battle of Mollwitz was fought by Prussia and Austria on 10 April 1741, during the First Silesian War (in the early stages of the War of the Austrian Succession). It was the first battle of the new Prussian King Frederick II.  Halfway through the battle following the defeat of the Prussian cavalry on the right wing, Frederick was advised to flee the field which he did.  However the Prussian infantry went on to win the battle under the command of Count Schwerin. 

 References

 Rules

This was the first game I played with the Twilight of Soldier Kings rules which I have reviewed in an earlier Blog post Twilight of the Soldier Kings – Review https://weekendwargames.blogspot.com/2021/09/twilight-of-soldier-kings-review.html

Players

As this was my first outing with these rules I fought this as a solo game, which was handy as I was able to stop and ask the author some questions via the user group https://groups.io/g/TwilightSK

 Battlefield

I set up the battle on my 6’x4’ table and attempted to put in a few of the key terrain features,  mainly the Kleinerbach river, towns of Mollwitz, Grunningen and Hermsdof and the central woods between the two armies. 

The Battlefield


Austrian Right Wing


Austrian Centre

Austrian Left Wing

Prussian Army
 

The Austrian cavalry wings advance while the centre holds.  The Prussians advance their centre.


Unable to force the Austrian advanced guard of Hussars into a charge the Prussian cavalry get themselves in a bad position with heavy cavalry to both flanks.


As the Prussian Hussars retire behind their infantry centre the Prussians charge into the flanking Austrian cavalry and infantry line.  Unfortunately for the Prussians formed 18C infantry with support are capable of withstanding a cavalry charge and the Austrian cavalry have strength in depth which will give them a clear advantage in the melee.


At this stage the Prussian left wing cavalry were loosing badly.  Their right wing was just starting to engage with the superior quality Austrian cavalry.

With both Prussian cavalry wings in the process of being beaten the Prussian centre advanced.  The Prussian moral failed on both wings who retired from the field. The position seemed lost.  The Prussian army was forced to make as moral save or be defeated. Which they succeeded! 

At was at this point the Austrian General know he's made a mistake.  The Prussian infantry were greatly superior to the Austrians with a marked superiority in moral and rate of fire (iron ramrods v wooden ones) and more training.  The Prussian volleys destroyed or broke the first three Austrian brigades and the rest fled. 

Summary

A historically correct result and due to historically correct reasons, i.e. the superior rate of fire of the Prussian infantry.  In my mind this was a strong indication that the Twilight rules reflect the period vey well, based on a sample set of one battle 😃.


Twilight of the Soldier Kings - Review


Rules

I have played one game with the Twilight of Soldier Kings rules which I purchased from the Pike & Shot society but looking today I could not see them on their site but I did see then on Amazon.co.uk  https://www.amazon.co.uk/Twilight-Soldier-Kings-Frederick-1730-1780/dp/1916343503

Scope

These rules cover the Seven years War (SYW) and the War of Austrian Succession (WAS).  You can play them with any scale but they are ideally suited to 6mm.

Design Philosophy

The rules are quite innovative and take the approach that moral is the most important factor.  For example, there are not firing rules but rather your opponent must make a moral roll when they are in firing range of your muskets.  The rules assume that your troops will engage their enemy.    The question is how do the enemy react?

“In war, moral power is to physical as three parts out of four.”
Napoleon

 Command

I like the way command works in these rules.  Wargame rules seem to fall into two schools, some such as Polemos Ruse de Guerre and Blucher etc limit the number of commands points available to a general and thus force the player to prioritise which units get moved.   Some rules allow all units to attempt to move but it’s not guaranteed, this is the approach taken by Black Powder, Honours of war etc.

In Twilight any unit making a basic “advance in a straight line” move can do so freely but as soon as it gets more complex you have to roll for the order to be performed, sometimes there may be several rolls, e.g. ignore the enemy artillery bombardment, change formation and advance over the stream would require 3 rolls and could result in a unit changing formation reaching the stream but stopping before crossing. Typically one roll is required needing a 3-6 on a D6.

 Period Specificity

Some rules can apply to a very broad period, such as Blackpower and other are more focused to their time period, such as Honours of War.  The Twilight rules are very focused on the Seven Years War (SYW) and War of Austrian Succession (WAS).  There are sister rules for War of Spanish Succession & Great Northern War and also the 30 Year war.  The rules contain lists of troops by nation and by year for the periods covered.  The stats for the troops reflect their ability in each time period. For example, the superior firepower of the Prussian infantry over the Austrians in the early years of the WAS are recognised.

 Extras

There are multiple scenario books with orders of battle, maps and battle specific rules. These are great even if you don’t play these rules. The basic rule book contains a number of scenarios to get you started.

Scale

Units are brigades rather than battalions which allow the biggest battles of the period  to be fought on 6’x4’ or 8’x4’ tables.  All measurement in the game is by base widths which means as no rebasing is necessary. (Which is always nice). ).  A small battle such as Mollwitz approx. 20,000 per side will need 12 to 14 units per side.

Combat and Casualties

Units take 2 or 3 hits before they are destroyed.  Casualties are whole units rather than figures.  

 Things I am or were not sure about…

The rules do not allow light cavalry (hussars) to frontally charge regular troops.  My initial reaction was troops will do what they are told.

A cavalry officer who isn’t dead by 30 is a coward.

– Napoleonic cavalry general Antoine-Charles-Louis, Comte de Lasalle (1775-1809)

However having consulted far bigger brains than I, it would seem that Hussars did not go around charging formed troops in this period, at least not very often.  Frederick instructed they form the 3rd line behind Cuirassiers and Dragoons.  There is a period record of a couple of times hussars charged like dragoons but the fact this was reported suggests it was not common.  Having considered the above I think I’m happy for my hussars to support heavy cavalry and receive charges rather than initiate them.  It will force me to use hussars as they were used rather than as a wargamer.

 The distances used in the rules for movement and firing are accurate to the scale of the units.  My infantry brigades are 120mm wide (2 x 60mm).  An advance in line is 60mm forward and enemy react to musket fire at 60mm.  My only issues with this are, a small error in measurement can have a big effect and I feel like I could fight my battle on a toilet seat rather than spread across a wide table.  I’m more drawn to 12cm moves and 12cm firing ranges.  However….I have only fought one battle so this may just me being use to other rules.

Summary

These are rules with a strong period flavour.  They play quickly and do not require much bookkeeping. They allow you to refight all of the battles of the period.  I feel they may be a "marmite" rule set, people will love them or hate them.

Monday 27 September 2021

Kolín on 18 June 1757 - Blucher


The Battle of Kolín on 18 June 1757 saw 54,000 Austrians under Count von Daun defeat 34,000 Prussians under Frederick the Great during the Third Silesian War (Seven Years' War). Kolin was Frederick's first defeat in battle. It forced him to raise the siege of Prague, to abandon Bohemia and to retire to Saxony.

References:

Blucher rules.

The Blucher rules Blücher – Honour – Sam MustafaPublishing LLC are intended for Napoleonic campaigns and battles but with adjustment seem to be fine for the Seven Years War (SYW).  As a rule set they are very easy to learn and allow you to fight major battles such as Kolin with ~90,000 troops.  The rules use a random number of command points, rolled by your opponent, so a general is never sure how much of his force he can move and is therefore required to focus on the most important units first.  Units (Brigades) have a combat rating (Elan) which is worn down in combat.  In these rules your Elite brigade will start as more effective than a regular line brigade but after a combat or two they will have fallen well below the fighting effectiveness of a, average or even poor quality fresh brigade.

Rule changes

Cavalry in the SYW were not the force they were in the Napoleonic period.  This was due to a combination different cavalry tactics and better drilled infantry.   Infantry in the SYW & WAS did form square, just not very often and usually when guarding a flank. 

 I do not apply the rule that unprepared infantry when in combat against cavalry, must re-roll its successes for its combat score.    I keep the rule that attacking cavalry Re-Rolls Dice against prepared infantry must be re-rolled. 

Players

I played this game in July with my good friend John Dance and it was wonderful to have a face to face game after such a long break. John commanded the Austrians and I the Prussian underdogs.

Battlefield

I set up the battle on my 6’x4’ table and attempted to put in a few of the key terrain features,  mainly the village of Kreczor/Kutlire and the Swedish works as well as the central Przerovsky hill.


Battle

The Prussian plan was to refuse their right flank and push the left flank through the Austrian right.  The Austrian plan wasn’t to wait for the Prussians but to advance their centre and left flank and roll up the Prussian right.  


The Blucher rules meant at the Austrians were not sure what types of troops their were facing on the Prussian right.


 Unfortunately the Prussians found the ground  leading up to Kreczor/Kutlire slow going and the advance was very slow.  The Prussian left wing cavalry had a hard fight with their Austrian counterparts.  Although the Prussians won, they were a spent force.


The Austrian assault on the Prussian right wing was much more successful and began to drive the Austrian right wing into the Prussian centre.  


An historically correct result with the Austrians defeating the might of the Prussian army.   


Sunday 20 June 2021


1757-04-21 - Combat of Reichenberg


In the Spring of 1757, during the general advance of the Prussian columns on Prague, the Prussian Lieutenant-General August Wilhelm Duke of Braunschweig-Wolfenbüttel-Bevern’s column encountered an Austrian force under Feldzeugmeister (FZM ) Count Christian Moritz Mauritius Eusebius, Königsegg-Rothenfels.

Bevern's column came upon Königsegg who was manoeuvring ahead in superior force (26,000 men). Königsegg who could field some 16,000 men. Bevern approached Reichenberg in the evening of April 20 and found his way barred and had to take camp.

 see http://www.kronoskaf.com/syw/index.php?title=1757-04-21_-_Combat_of_Reichenberg

This was my first post lockdown game with my friends Mark and John.  John is a natural defender then counter attacker.  Mark is less experienced and therefore generally likes to be part of a team.  So just to surprise me Mark opted to be the sole Austrian defender and John and I were to Prussian attackers.  This was the first of joys of playing with real people and not solo.

As the Prussians were planning on joining the Army of Silesia. I had assumed this battle was in Poland but it was actually in central Germany.


This was a defensive battle with entrenched Austrians along a hill line and in wood, with attacking Prussians. In the actual battle the Prussians won.
The Austrian lines


The battle started with the Prussian right wing. lead by the one cavalry brigade,  moving to and crossing the marshes. The Austrian cavalry brigades came forward to meet them.  


The battle on the Prussian right wing went well for the Prussians and the Normann Dragoon brigade was destroyed by Prussian musketry and broke fleeing the battlefield.    The remaining Katte Curassier brigade bounced off the elite Prussian Grenadier battalions.   The Prussians were poised to advance into the woods and assault the Austrian  in their woodland defences.

Meanwhile in the Prussian centre and left the brigades advanced into the cannon fire from the entrenched Austrians.  The stream down the centre of the valley did not have much impact on the advance.


As my Prussian assault advanced on the Austrian lines, I was surprised by Mark as his troops abandoned their defensive fortifications to try and flank my assault.  This resulted in a battle line running across the battlefield as my troops had to turn to face the threat.  Luckily my read was secure as John's forces on the Prussian right flank had broken the Prussian cavalry threat and the Austrian troops in the woods were trapped in their own fortifications.


It was a bit touch and go for a moment with one of the assaulting Prussian brigades breaking under the Austrian counter attack but the Prussians had the numbers and Prussian Dragoons coming up from the right flank swung the day and the Austrians were forced to concede the battlefield due to the lose of too many brigades.


An enjoyable game with tactics I'd never have used if i fought it solo. 


Saturday 19 June 2021


Black Power Rules 
and the Seven years' War, War of Austrian Succession and the War of Spanish Succession


 I thought I'd post on here my customisations for Black Power v2 for fighting SYW, WAS and WSS.


Below are my thoughts on troop types for the major armies and their stats.  The stats include  points costs, although most of my battles are based on historical orders of battle.

Not that it makes any difference to the rules but I play in 6mm and convert all BP measurements to cm.

I must add that these are very much work in progress and intended for wargames between myself and friends.  Please free to use them as much as you like for your games.  They may not be sold or used for profit.  If you use them, let me know. If you have improvements, let me know.

Have fun!

Eddie Stewart game@whitetiger.me.uk 

Sunday 9 May 2021

Progress on Paining SYW units from the Battle of Minden 1759

  Like most of us I have more than one project underway.  This is my progress over the bank holiday and following weekend working on the British/German side of the Battle of Minden 1659.


Brunswick Behr (1 bn) & Imhoff (2 bns)


                                                           Hessian Leib Grenadier

Hanoverian Converged Grenadiers (1 bn) under Wersabe


Hessian Gilsa (1bn)  & Hessian Leibgarde zu Fuss (1 bn)


Progress so far


Not yet painted are in red

Main Army under Ferdinand of Brunswick

Seventh column under Lieutenant-General von Imhoff

Major-General von Einsiedel's BrigadeMajor-General von Behr's Brigade

Eighth column: Left Wing under Lieutenant-General the Duke of Holstein

Lieutenant-General the Duke of Holstein's BrigadeLieutenant-General von Urff's Brigade

Wangenheim Corps between the village of Kutenhausen and the Weser

Cavalry Right Wing

 Prussian Ruesch Hussars (1)

Progress on Projects over the Early May Bank Holiday

 Like most of us I have more than one project underway.  One of my current projects is painting the Bavarian Army of the War of Spanish Succession (WSS) .This is my progress over the bank holiday and following week:


Bavarian WSS

I painted, flagged and based four 2nd battalions of the Leib Regt, Mercy Regy, Kurprinz  Regt and Maffei Regt.  


This takes my Bavarians up to 8 foot battalions, from 4 regiments and 3 kuirassier regiments.


Sunday 31 January 2021

Progress in a year - 2020


One year since my last painting & basing audit. During 2020 I painted and based 88 bases of figures, ( 32 60x30mm bases of cavalry, 21 60x30mm bases of infantry, 10 30x30mm bases of skirmishers, 18 command bases, 4 30x30mm artillery, 2 40x30mm bases of sheep and one 6 in hand carriage).

or counting figures rather than bases... 940 figures (317 mounted, 603 foot, 20 sheep & dismounted horses and 4 cannons). 78 figures painted and based per month.


Like
Comment


Saturday 23 January 2021

WSS Counter Ambush


This was my first lockdown battle of 2021. I based the battle on the count-ambush scenario from Programmed Wargames Scenarios by Charles S Grant. I tried a new approach which was sharing notes and pictures with my friends on messenger. (Which is the reason for some poor spelling on the picture labels.)  The battle was fought in 6mm using Blackpower 2 rules with  rule supplements and my troop statistics.

English Foot


Bavarian Foot


The year is 1704, the War of Spanish Succession is in full swing. While the Duke of Marlborough is manoeuvring his army into what will become the battle of Blenheim he becomes aware of a French supply train carrying vital gunpowder stocks protected by a small escort  of Dragoons. A joint English/Imperial force is positioned for an ambush on the north/south road.

Map of the Battlefield
 (Top of the map is North East. East to West is [C] to 8.)

Two English Brigades (6Bn) are placed in the woods (location 2) with two Gun batteries on the hill to their south (loc 8).  This will allow the English forces to attack the North-South road from the West and for the Guns to sweep the road as far as the bridge.  A brigade of English Dragoons hides in the woods (loc 3) ready to cut off the French.

The Imperial forces with their overall CinC have a strong brigade (4 Btn) in the woods (loc 1) and two batteries of guns. The marshy ground (loc 4) is occupied by two btn of Pandours. (Panadours are irregular light infantry from the Hungarian boarder with the Turkish empire.  First class looters, 2nd class soldiers but perfect for fighting in rough terrain.)  The CinC has placed himself at this point  as the Imperial  brigadier is lacking in initiative.

English Brigade at location 2

Imperial Foot location 1

 Pandours making use of the marshes for cover


English Guns location 8

Alas….
Bourbon sympathises (presumably biscuit lovers) warned the French and the French General ordered a joint French/Bavarian force to march through the night into a flanking position to ambush the ambush.  Marching through the night resulted in some problems position the army and the entire Bavarian force became lost are a move off the battle field to the north.

Two regiments of French Light cavalry (Loc [A]), despite the title they are heavy cavalry the name was used to remove confusion with the Kings Household cavalry with orders to sweep down to the woods at loc 3. Three battalions of French foot with attacked Aty [loc B] with orders to assault the woods at 1. Four composite battalions for grenadiers (elite) (loc [C]  with orders to support the foot. Two dragoon regiments at loc [D] with orders to scout the woods at 6,5 and 1.
The “lost” Bavarians include, 2 Regts of kuirassiers with orders to move with the French Hse.  Three Btn of foot with attached Aty, with orders to support the attack on the woods at 1.
The Imperial /English forces find themselves out of position. Set up to attack an enemy on the north/south road but flanked by a force of roughly equal size!  

French Foot and the Generals Mistress arrive

Battlefield at Dawn

1st Hour after Dawn
The Imperial commander realising that his position was exposed ordered his brigade to fall back to the English position.  At the same time the Pandours left the marshland and advanced to the woods knowing that fighting in rough ground was their forte.  The English command was in some confusion with one brigade wanting to advance and one wanting to hold.  The English Dragoons exited the woods to face the French horse.
The French Dragoons held position looking for Ambushes (failed order).  The French foot advanced to the woods (loc 1).  The French cavalry stood and watched the English Dragoons come out of the woods in from of them.


2nd Hour after Dawn
The Imperials made a fast march to the rear bringing them wall away from the woods. The Pandours closed in on the woods. The English straightened their lines.  The Dragoons choosing not to charge the French Cavalry.
The French Dragoons search the woods for further ambushes.  The French Foot in a show of French elan marched swiftly forward almost reaching the woods.  The French horse charge the English dragoons who counter-charged keeping in a close knee to knee formation. The two cavalry brigades clashed with brutal ferocity.  The English were slightly outclassed on paper but fully held their own in the melee. Both fights were bloody draws with all four regiments being shaken by the amount of casualties on each side and each brigade reeling back broken and of no further use in the battle.


The French horse charge the English dragoons who counter-charged keeping in a close knee to knee formation. The two cavalry brigades clashed with brutal ferocity.  The English were slightly outclassed on paper but fully held their own in the melee. Both fights were bloody draws with all four regiments being shaken by the amount of casualties on each side and each brigade reeling back broken and of no further use in the battle.


3rd Hour after Dawn
On the English (west) side of the field the English foot were disjointedly trying to form a battle line at the woods (loc 3).  The Panadours realising how close the French Infantry were to the woods fell back to the marshes,  The main Imperial foot continued to fall back. The Imperial artillery batteries dropped a fuselage of balls on the limbered French artillery, leaving them shaken.  
The French Foot held behind the woods waiting for the grenadiers and Bavarians to move up in support.  The civilian transport contractors deserted the guns leaving the gun crews to set up the guns.
The Dragoons galloped up behind the Imperial foot within musket range  in an overzealous interpretation of orders.
The "lost" Bavarian forces arrived behind the French lines.  A Kuirassier brigade of two regiments and a brigade of three battalions of foot.


4th Hour after Dawn
The rear two battalions of Imperial infantry took an initiative order to turn around and fire a volley at the French Dragoons who took minor casualties and fell back out of range.  Two English Btn in a moment of confusion decided to march sideways into a marsh. The Bavarian kuirassiers  opted not to charge the two English battalions to their front. Everyone else moved about a little bit but not significantly.

5th Hour after Dawn
The French Dragoons moved in to the woods (Loc 1), dismounted and took up firing positions.  The French grenadiers marched quickly towards the flank of the English battalions who were claiming out of the marsh.  The Bavarians  moved up on support of the Grenadiers but were left behind by their rapid advance.


6th hour after Dawn
The English fall back and form a line just out of musket range of the French Grenadiers.


7th hour after Dawn
In a reversal of the original French plan the Bavarian brigade advance rapidly through the French line and assault the English line.   Two battalions v two battalions.  One Bavarian battalion is destroyed and the other is shaken by casualties.  The loss of two battalions break the brigade.  The English battalions fall back but rally.


8th hour after Dawn
The Imperial brigade  after some confusion advance into contact with the French line brigade wile the French Dragoons exchange fire with the skirmishing Panadours.  The French line break under the assault and the brigade routs.  
The French Grenadiers realise that with the loss of the French line brigade and the Bavarian brigade it all depends on them and they fix bayonets and charge the English line. The fight is fierce but once again the French are out fought, and they reel back broken.


The French counter-ambush has failed.  The Imperial and English forces win the field of battle.


Victorious 


It was a fun game.  I'm not sure the idea of sharing the battle on-line with friends worked. It was a lot of rushed effort for little return.  The programmed scenario gave a good start point and overall strategy.