- Web site: Kronoskaf Battle of Minden
- Web site: Wikipedia Battle of Minden
- Book: Like a Brazen wall by Ewan Carmichael from Helion publishing
I'd casually suggested to my gaming friends that I'd like to refight Minden and found myself on the hook to arrange the battle, something I was very happy to do. The next month was busy creating the order of battle, deciding on the attributes of the units and painting an extra sixteen battalions and three cavalry regiments. One of the joys of 6mm is I can paint and base a battalion of 24 figures in about an hour.
The Battlefield
.png)
The forces
I was keen to try and reflect the historical advantages and disadvantages of the forces engaged in the battle, especially the performance (or lack of performance) of Sackville commander of the British contingent at the battle. I'd always written him off a poor commanded but having read more about his courts martial in Like a Brazen wall by Ewan Carmichael I now wonder if he was thrown under the proverbial bus for political reasons.
It was important to give the British troops stats that gave them a chance to perform as well as they did at the battle. I was also aware that French battalions at the battle were in general smaller than those of the Anglo-Germans.
As the battle was going to be fought on a 6'x4' table in a morning, I reduced the number of units represented to One Battalion per two battalions actually present and each of my cavalry regiments represented about five squadrons.
The re-fight of the Battle
I was joined by three of my friends, Mark Browne, John Dance and Paul Smith. Mark and I took the French-Saxon and John and Paul the Anglo-German. Each of the commanders were labelled with their name, command rating and the break point of their command.
Pre-Dawn at the Anglo-German HQ

View of the Battlefield from Kutenhausen towards the French lines with Malbergen in the mid-ground.

French Right Wing
The assault by the French right wing played out historically correct. The French Grenadiers bravely lead the assault on the Anglo-German left under Von Wangenheim. Although brave the French forces could not withstand the bombardment by the allied artillery backed up by their Converged Grenadier Brigade and Hanoverian forces. The French grenadiers under Comte de Saint-Germain's broke leaving the remaining French forces out numbered by the allies behind their field entrenchments.
French assault reduced to by half after the loss of the Grenadiers de France & Grenadiers Royaux.

French Centre
The French centre pushed forward and took the village at Malbergen. It was a good defensive position and they held off the frontal assault by the Anglo-German centre but the collapse of the French right wing left the right flank open and the command had to be given to withdraw back towards Minden.
French centre holding steady

Flanked

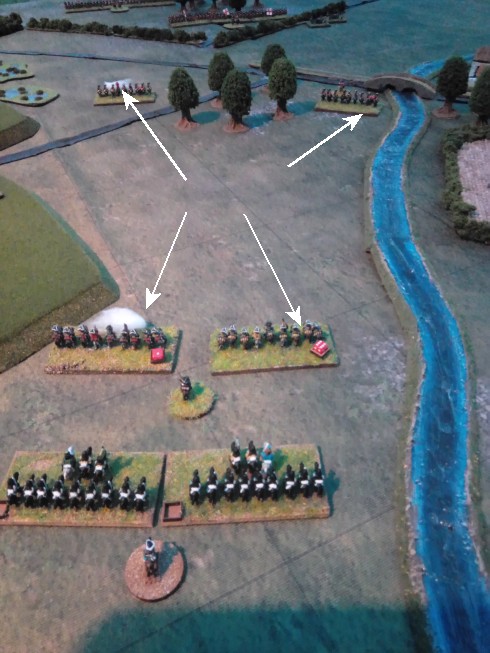
The French Left
The role of the French left was to quickly smash the Anglo-German forces between Hahlen and the woods and then to turn the flank and then join the forced at Malbergen in the centre of the battlefield. Wave after wave of French horse changed the allied forces, supported by French foot. Unfortunately the British heavy cavalry were able to activate and advanced into the fight. In the end the French won but had to throw in their Saxon reserve under Prince General Xavier.
French push north from Hahlen the British just the other side of the woods

The French reserve (Saxon's under Prince General Xavier

The End
Despite a victory for the French on their left but to little and too late. The French right was lost and the centre could not hold without support. Maréchal de Contades was forced to concede defeat. The battle fought out pretty much the way it did in history. The French righ were wiped out by Anglo-German artillery and the huge French cavalry force were wiped out, although in this version by Hanoverian Infantry and the British horse.
Aftermath
It was wonderful to be able to play a game with friends after such as long lockdown. I'd like to give a huge thanks to my friends, John, Mark & Paul, for indulging me I bit off a little more than I could chew with this battle as I'd hoped we could run it in 2-3 hours and it took 4. Sadly several players had to leave and missed the last hour. I have some ideas on how to make our next battle quicker....