Thursday, 13 August 2026

To The Strongest - 15mm Post To The Smallest 2026


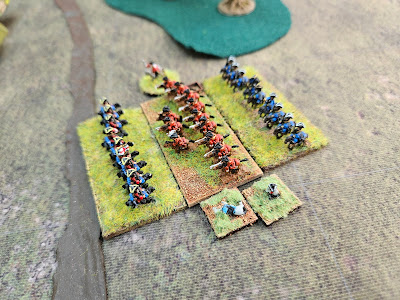
 This was my first game after competing in the To the Smallest in Cardiff in July and I wanted to share and solidify the rule clarifications I had learnt during the competition. The key rule clarifications I picked up were:

1. A key takeaway from the Cardiff event was that LI with javelins do not receive a free throw when included in a simple ‘advance one square’ order alongside heavier troops. To throw, LI must be given an explicit ‘advance and throw’ order, separate from the movement of other types of troops.

2. A general cannot redraw an order card on a Group Move. (He can when moving two units in a square).

Opponent: My opponent for the battle was James, who is on about his fourth To The Strongest (TTS) battle.

Battlefield: As the mini game for setting up a battlefield terrain takes 30min or so, therefore I decided to use one of the pre-designed battlefields from the competition. I picked Cannae 216 BCE as I had the terrain and I’d lost on this battlefield in the competition.

Armies:


Troop Disposition and Battle plan

The Roman strategy was to:
  • Rapidly advance the Veteran Legions and engage the Raw Macedonian Pike while at the same time driving off the light troops on the Macedonian left wing allowing the Roman Cavalry to envelope the Raw Pikes, charging their flanks and rear.
  • The Javelinmen and light troops on the Roman left flank were to prevent the Macedonian light troops from enveloping the Roman left flank.
  • The Roman Legions on the left flank were to demonstrate against the Macedonian cavalry and Infantry centre but not to engage if possible.
Progress of the Battle
The battle started to plan although the light troops on the Macedonian left provided more resistance than expected which slowed the defeat of the Raw Pike blocks. However the Romans were well ahead in medals.

Then Disaster! A veteran Roman cavalry regiment eager to charge the rear of the Macedonians turned it’s back on a unit of Macedonian Light Infantry slingers. In one round the Roman unit was destroyed and the general killed, a loss of four medals.

The loss of the Raw Pike blocks and some light troops was not enough to win the battle, and the Veteran Roman Quincunx was forced to engage the Macedonian Pike blocks who had wheeled 90 degrees and were at risk of attacking the Roman’s flank. The fight did not go well for the Romans, and they lost a veteran Quincunx and a second general, a loss of 5 medals!


The Result
Night fell over the battlefield of Cannae with the score of 12 medals out of 14 captured by each side. A draw!  In an interview the Roman general Cassius Ceramix, is reported to have said "Victoria nobis erepta est!"

Thursday, 18 September 2025

Solo Campaign - Seven Years War


I want to design a set of wargame rules for running solo campaigns and their component battles. Before diving into the design, I thought it best to stand on the shoulders of giants and learn from those who have gone before me.

To that end, I created a solo wargame campaign focused on a segment of the Seven Years’ War (1756–1763). I anchored the campaign timeline and movement using Bob Cordery’s Snakes & Ladders Campaign System from The Portable Wargame Compendium. I then resolved individual battles with the Dominion of Frederick the simple rules from Ork Publishing.

Although both the Snakes & Ladders system and the Dominion rules are heavily dice-driven—running counter to my instinct for hands-on control—they allowed me to play a solo campaign (October 1756–June 1757) in under two hours. That speed is an asset: I can replay the entire campaign multiple times in a single afternoon to test different outcomes.

The lessons learned from this solo-campaign experience will guide me as I craft my own rules. I plan to consider the best elements of these existing systems with a more active role for myself as the commanding general.

 Campaign Map

The “snakes & ladders”  delivering the campaign sequence fits on a single side of A4 and will be familiar to anyone who has played “Snakes and Ladders” as a child.  The Prussians start on the first square at the bottom-left of the page called “Start invasion of Saxony 1756” and then roll a D6 to progress through the campaign, going up blue arrows and down red arrows if a move ends on that square.  Stop when moving on to a battle square regardless of any unusual movement.  The battle is then fought and if won the Prussians advance along the green arrow and if lost movement recommences on the next square.

 Battles

The battles were fought using the “Dominion of Frederick” rules using the troops listed for each historic battle in the rule book.  The battle of the Saxon army blockaded at Pima is not historical as the Austrians were unable to relieve the blockade before the Saxon’s surrounded to Fredric the Great.  For this battle I used the troops from the example battle in the rule book.

Campaign rules

The results of each battle do not stop the Prussian progress towards the “Battle of Koln” .  I gave the winning side of each battle a +1 on their rally roll in the subsequent battles.  My justification was that the moral boost of winning made it easier for a general to rally a defeated unit.

The campaign played out as follows:

The Prussians advances swiftly and without incident to battle at Prima.  The battle was a resounding victory with few Austrian losses.

Enthusiastically advancing to battle at Lobositz the Prussians suffered a stinging defeat from the Austrians under von Browne.

Not allowing themselves to be disheartened the Prussians pressed on to steal a victory  they had no right to win  at Reichenburn.

The arrival of fresh supplies allowed the Prussians to bypass battle at Prague and arrive at Kolin for the very closely fought final battle of the campaign.  Victory was won by Austria and the Prussian menace was defeated…for now.

Resources

Thoughts going forward

Thoughts going forward on the campaign map (view)

  • Fill in more text in boxes and add more red arrows that are skipped by winning a battle.
  •  Add some impacts to the armies from blue and greed arrows such as gain or loose an army point.
  •  Add some way to influence the progression around the Campaign trail; e.g. allowing a plus/minus one square that is earnt by winning a battle.

Thoughts going forward on the Dominion rules (view)

  • I’m unconvinced that Cav should have +1 v Line Infantry as they already have a one point advantage over infantry.  My understanding of the period was that Cavalry did not fare well against formed infantry but rather fought the opposing cavalry and then attacked the flanks of unsupported infantry. In future games I’ll drop the +1 mod for Cav v Inf .
  • In this period line infantry defended well against cavalry so I’ll allow all infantry that are attacked a +1 against cavalry but infantry attacking cavalry will not get this advantage.

 Thoughts going forward with solo campaigns

  • The speed was very good but I’m willing to go slower if it allows me more input into strategic decisions.
  • The speed of the battles was good, but I’d like to add details such as terrain etc.
  • For my next solo campaign I'll use the 3x3 Portable Wargames rules and I might also try the DBx rules as they will both allow more control over the battles although at the cost of requiring more time to resolve.
Please get in touch with any thoughts or feedback.


Dominion of Fredrick the Great - Rules Review and Battle of Koln


The Dominion of Frederick the Great rules offer a fast-paced, accessible system for mid-18th-century battles. They will likely be loved or hated by wargamers, depending on personal taste. The battlefield is split into four sectors—left wing, centre, right wing, and reserve—and combat between each sector is resolved with a single D6 roll per side.

Dominion of Frederick the Great is published by Ork Publishing and available on Wargame Vault (https://www.wargamevault.com/).  There are a number of “Dominion of …” rules available covering from  Ancients to ACW.

These rules excel when used as part of a wider campaign. A full battle plays out in five to ten minutes, keeping the momentum of the campaign moving. Below is a step-by-step run-through of the 1757 Battle of KolĂ­n from the Seven Years’ War, which I completed as part of a solo SYW campaign in under two hours.  

See my blog post  Solo Campaign - Seven Years War - 1756 - Prussian invasion of Saxony and 1757 - Prussian invasion of Bohemia for the wider context 

 Set up for Koln 1757


The set up ate the start of the battle:

Prussians: 2x Cavalry, 2x elite Line Infantry, 1x Line Infantry

Austrians: 1x elite disciplined Cavalry, 1x Cavalry, 1x Skirmishers (Croat Grenzers), 1x elite fortified Line Infantry

 Turn 1


There was minor skirmishing on the Prussian left flank but the centre was the scene of fierce fighting with both Prussian and Austrian elite infantry being destroyed. The Prussians filled the gap with more elite infantry and the Austrians with their elite cavalry.

 Turn 2


 The fierce fighting in the centre continued with both sides loosing troops.  The Prussians filled the centre with their reserve cavalry.  On the Prussian right flank their cavalry were defeated by the Austrian cavalry.   This left the Prussians with a gap in their right wing and the Austrians with a gap in their centre.  Both sides failed to rally their lost troops.

 Turn 3


 Sensing the chance the cavalry in the Prussian centre flank charged the Austrian Grenze Skirmishers however to no effect.  The Austrian left wing cavalry then changed across the battlefield and caught the Prussian cavalry by surprised and smashed them.

Turn 4


 A close fought battle but a historically correct win for Austria.


Please feel free to reach out to me with any thoughts and comments.

Thursday, 30 January 2025

Ramillies 1706 - Re-fight

 War of the Spanish Succession 23 May 1706

Pro-Habsburg Forces under The Duke of Marlborough approx. 69,000 with 120 guns
Pro-Bourbon Forces under le Duc de Villeroi & the Elector of Bavaria, approx. 68,000 with 70 guns

Played with Twilight of the Sun King rules (with one 60x30mm base per brigade rather than the standard two 60x30mm bases per brigade)  with 1200+ 6mm figures on a 6'x4' table.

Reference 

Battlefield
From the French point of view the left wing of the battlefield was separated by rough terrain not suited for cavalry.  The centre around Ramillies was more open and the right flank was ideal for cavalry. Both commanders placed their infantry on the French left and centre and massed their cavalry on the French right flank.  Both commanders  left some cavalry to guard the left flank but with no intention of actually attacking across the rough ground but rather just in case the opposition were foolish enough to do try an attack across the rough ground.

The battle commenced with an artillery bombardment.  One of the things I like about the TotSK rules is that long range artillery bombardments may disrupt troops maneuvering but unless massively concentrated they will not cause casualties (a loss of moral in these rules.)


The  infantry of the  Grand Alliance ( Austria, England, and the Dutch Republic) under Marlborough  advanced on the French, slowed down by the rough ground separating the armies on the left of the French lines.  The British horse pulled away from their position on the French left and rode with some hast behind the British lines heading to the other flank. 


The French cavalry advanced smartly against the  Grand Alliance cavalry.  The Duke of Villeroi plan being for his superior cavalry to crush their opposition and then to flank the allies infantry lines. 

The cavalry wings clashed, over 150 squadrons of cavalry, 20,000+ cavalry charging and counter charging.  A nice detail in the TotSK rules is that defeated cavalry flee a full move from a losing combat unless they have reinforcement to their rear in which case they fall back behind their support.  This givens a nice rolling combat with weakened horse falling back behind reinforcements.


In the centre the allied infantry assaulted Ramillies and then Offus and finally Autra-Eglise.    Unlike the cavalry fight the infantry combat was a slower grind.  The rules give a bonus to moral tests for troops with rear support  and infantry  inherently harder to break than cavalry (3 hits opposed to 2).


The cavalry fight was going against the French when  the arrival of the British horse pulled from the opposite flank made it even more difficult for the French and lead to the eventual collapse of the French cavalry wing.


The Allied cavalry started to wrap around the flank of the French army.  The French infantry still held the three villages of Ramillies, Offus and Autra-Eglise although the fight was starting to slowly swing in favour of the allies. However with the allied horse free to swing onto the flanks and rear of the French Army,  the Duke of Villeroi conceded the field  and victory to the  Grand Alliance.


Comments
This wargame ran very close to the original battle.  I found the Twilight of the Sun King rules to be quick and to give a "realistic"  outcome.


Thursday, 26 December 2024

Ramillies 1706 - Setup


Ramillies 1706

War of the Spanish Succession 23 May 1706
Pro-Habsburg Forces under The Duke of Marlborough  approx. 69,000 with 120 guns
Pro-Bourbon Forces under le Duc de Villeroi & the Elector of Bavaria, approx. 68,000 with 70 guns

Reference 

This battle took place two years after Blenheim and the French were there to revenge their defeat.  

The French commander, Villerori had pick Ramillies as the place to meet and defeat the British and their allies.  The Petite Gheete stream would disrupt the British advance and hamper their cavalry.  This would buy time for the French cavalry massed on the right wing to engage and crush the cavalry of the British and their allies.
In the option of Villerori (and most pundits) the Frech cavalry were the finest in Europe and their defeat at Blenheim was mainly due to a disease (glanders)  having swept through the French horses just before the battle.   The French cavalry commander Guiscard had noted the success of the British/Dutch  tactic of charging at the gallop and had decided to meet any charge with a hard counter change.

The British commander Marlborough had picked Ramilliers as the place to meet and defeat the French.  The Petite Gheeie stream would have little effect on the advance of the allied infantry and the superior firepower of the British and Dutch infantry would break the French foot .
 The reputation of the  French cavalry was strong but the British and Dutch cavalry had already shown at Blenheim that they were as good as the French and their tactic of galloping at the enemy was superior to the French tactic of trotting and firing pistols.

(Click to enlarge)


more to follow...

Tuesday, 24 December 2024

A Bigger DBN - SYW Battle


Having fought a battle with the  DBN-SYW rules a couple o f weeks ago I thought t I'd try a larger battle to see how suitable they were for a large number of units. Once again I fought this solo so that I could concentrate on the rules rather than on wining.

The fictional battle was British & allies  vs French with  16 Bn of Infantry and 8 Regt of horse on each side, plus a few guns.


Observations

The rules give an advantage to supporting fire which encourages infantry to form in-line without rear support.  Historically armies in this period formed up in two or three lines of regiments.  I can see the advantage of having more muskets to bear but there should be a reason to have rear support when you are not in melee. (Something to consider improving)

The musketry rules do a good job of showing the grind of combat with infantry regiments being ground down before breaking.    The British left flank had 8 battalions vs 8 French battalions and it took 4 or 5 rounds before holes started to appear in the lines.  Once the holes started to appear the combat accelerated to a conclusion.


Infantry assaulting a village (BUA) have a hard time and need an advantage in numbers and/or quality if they are to win.


A elite French Cavalry regiment with rear support cut their way through 3 British Regiments without taking any losses.    This seems unlikely as surly they would have taken some casualties from each victory and if nothing else their horses would be tired.   (Something to consider improving)


Conclusion

The rules handled the 48+ units well and  in a reasonable time (2hrs) .  It would have taken longer with an opponent as there would have been more thinking time.  Although there are a few items to consider these are a good set of rules.


Sunday, 15 December 2024

DBN - SYW Play Test


Historically, I have always loved reading rules, but I have the concentration of a goldfish when it comes to wargaming a period. I tend to flit from one rule set to another, never settling on a single set. However, I've decided to reduce the number of rules I use and focus on my favourites. As part of this effort, I've decided to fight, in 6mm, roughly the same War of Spanish Succession (WSS) battle using different rules to see which I prefer. See the Summary Page for other rule reviews.

Reference:
Overview

The DBx range of rules have been around for many years and have both strong supporters and strong detractors, , especially the DBA version.    Although it is easy to play DBN like DBA, i.e, as a 12 unit v 12 unit battle on a 2'x2' table, the rules do not have to be played this way and they can be used in a more conventional wargame style reflecting historic army and battlefield sizes.  

The DBN rules cover the Napoleonic wars but I used the SYW supplement available for free from the DBN web site. My interest was to use the rules to refight battles on a 6'x4' table with units based as 60x30mm.  The rules base units on a 40mm frontage which represents 100 paces.  In my games units have 60mm frontage which represents 100 paces.  In my notes 1 BW (base width) = 60mm but if you play by the rules as written 1BW = 40mm.

The rules offer the ability to have combat using the traditional DBA approach or a new attrition approach.  I used the attrition approach.

I played a sole game with 13 units on each side in 1:30hrs including time to check on rules. 

These rules contain a number of  elements  worth comment.  These are:
  • Friction of command:  Players roll a D6 for command action points (CAP). One point allows the general to move a unit or group of units within his command radium.  It's an extra point if they are further away.  A nice point is the command radium is effected by line of sight.  The effect of this CAP system is a general cannot always move all his command.  
  • Turn sequence:  The traditional I go/you go with move, shoot, melee.
  • Combat: Melee and firing are separate but the mechanics are the same.  A unit rolls a D6 and add factors. Double ethe score and a unit is destroyed or the lowest scoring unit received a hit.  Three hits destroy a unit.   I particularly like how this mechanic avoid the problem of one unit firing and causing casualties before their opposition get to fire.  A disadvantage is that elite units who win can  keep on defeating their opponents without ever taking casualties (however it's not very likely).
  • No of units:  A unit can be regarded as a battalion or assumed to be several.  A typical army has approximately  12 or so units.
  • Special equipment: None.  A tape measure and a D6 is all that's needed.
  • Casualties: Players need to be able to record casualty hits on units until the unit is removed.  There are no figures removed as casualties. Three hits destroy most units.
  • Scale: The rules work with standard  40mm base sizes but   As I was playing with 60x30mm 6mm bases it was trivially simple to convert to using 60mm bases.
  • Availability:  DBN Web site http://dbnwargaming.co.uk/
  • Cost: $15 for the pdf.  Seven Years war rules are a free download but require the full rules

Battle
Time Period: WSS 1701 (pre-creation of Britain)

Although this game as played solo, I fought it from the side of the British with the French taking minimal steps to repulse my attack, which makes victory less impressive. 

The Battlefield.
The battlefield was set up to allow for the various tests in the scenario.

English
4 English Infantry 
4 British standard Horse 
2 German allies trained Infantry 
2 German allies elite Infantry.
1 Medium guns

French
8 French trained Infantry  
2 French trained Horse
2 French Elite Horse
1 Medium guns


Stream Crossing: Stream crossing was not an issue.  Troops simply move more slowly over the difficult ground.

Cavalry v's Cavalry: The French horse split into two forces.  Two regiments moved to attach the English's German allies and the remaining force attached the four English horse.  The four to two odds allowed the Trained English horse to fight on an even footing with the Elite French horse and with an advantage against the trained French horse.    The English rolled some lucky dice and wider out the French horse.


Cavalry Frontally changing Formed Infantry: The Elite French horse charged the Elite German  foot with both units gaining support from adjacent friends.  The German foot won but took so many losses that they did not have the strength to press an attack against their objective which was a French held village.

On the English left flank the weakened French infantry were charged by the English horse and due to the casualties they had already taken they were cut down.  The game ended before the English horse could attempt to roll up the French flank.


Artillery: Artillery had a minor effect on the battle as Guns need to roll two higher on the combat dice to cause casualties on foot.  This feels about right as it prevents artillery dominating the battlefield

 Infantry vs  buildings: Infantry firing into buildings are at a considerable disadvantage and as the looser of an exchange for fire takes a hit , the attacking unit is soon warn down.  Assault by bayonet is a better option than shooting .  (Note: this differs from the standard rules where an assault on a building needs 3:1 or better to have much chance of victory.) As the German assault was with troops who had been mauled by cavalry and then shot from the village it failed  very quickly.

Infantry vs Infantry: The English infantry advanced across the field and closed in on the French right.  On average it takes 4-5 rounds to destroy the opposing infantry and your troops will be weakened. Firing is based on opposed rolls with one side or the other taking losses each time (unless they roll a draw (approx. 1 in 6) so the fight is quite attritional.


Army Moral: The English won the battle due to French losses.

Summary:  The rules played  were easy to pick up . Although it's possible for elite units to not take any casualties they tends not to happen.  Most melee and firing takes 2-4 rounds to resolve

Tuesday, 10 December 2024

Maurice Play test


This is part of a wider review of rules for the WSS, WAS & SYW.


Overview

Like all of Sam's rule books, these are well-written and boast high production values. In addition to the "battle rules," they include guidelines for both "real" and "imagination" campaigns. The rules require a set of cards, which are used to issue orders and influence combat, such as providing a bonus when firing.
Copies of the basic cards can be downloaded for free from Sam's website, along with a copy of Maurice-lite, which is sufficient for an evaluation battle or two.
The rules cover the "lace wars" period and contain optional rules to shade them towards different ends of the period, from the War of the Spanish Succession (WSS) to the Seven Years' War (SYW). The rules play quite quickly and allow historical battles to be tuned to represent the troops or commanders who were present.
It is not intended as a criticism but rather an observation that, like most of Sam's rules, I find these rules to have a number of game-play elements which, on one hand, feel artificial but, on the other hand, add an extra level of skill and enjoyment to a wargame. I believe that you will need to fight a number of battles with these rules in order to learn the best way to win.
.

These rules contain a number of elements worth commenting on:
  • Friction of Command: The rules allow the CinC to activate one force at a time. Therefore, there is a risk that battles become very focused on one force unless the general learns to spread his focus. Mechanistically, this is similar to the DBx rules sets with limited command action points (CAP) preventing a general from moving all his commands in a turn, or the command role style of rules, similar to Black Powder, which require a successful activation roll to move each command.
  • Turn Sequence: Turns are quick to resolve as one force is moved each turn. This gives a quick-paced game where players are not waiting for their opponent to move their entire army before they have their own turn. In two hours, my opponent and I probably had 20-30 turns between us.
  • Firing: Is done by rolling dice to hit, equal to the number of bases in a unit, and then a subsequent casualty disruption roll is made based on the quality of the troops, e.g., it's easier to disrupt a unit of conscripts than a guard regiment.
  • Melee: The rules handle 1:1, 1 to many, and many to many melees. This is a good example of how well Sam writes rules. Each unit in the melee rolls a D6 and adds factors. The losing side can be destroyed or take two disruptions, and the winner will receive disruption casualties.
  • Artillery: A battery has about the same firepower as an infantry base/two bases at canister range.
  • Number of Units: A unit can be regarded as a battalion or assumed to be several. A typical army has approximately 15 or so units. The rules include a refight of the Battle of Fontenoy, which has about 18 units per side.
  • Special Equipment: Core to the game are the Maurice cards, which must be purchased separately or a simple set downloaded from Sam's website.
  • Casualties: Players need to be able to record casualty hits on units until the unit is removed. There are no figures removed as casualties. Five hits destroy most units.
  • Scale: The rules work with all base sizes. All distances in the rules are given in BW (base widths). As I was playing with 60x30mm 6mm bases, I declared a 30x30mm base width, which resulted in 120x30mm units.
  • Availability: Wargame sites (and in my case, eBay).
  • Cost: ~£30 each   for the rules & cards.

Battle
Time Period: WSS 1701 (pre-creation of Britain)

As the game makes use of hidden cards, I fought this with an opponent so that I could be surprised by the cards played. I commanded the English and their allies, and my opponent the French.

The Battlefield
The battlefield was set up to allow for the various tests in the scenario.
English
• 4 English Trained Infantry
• 4 English Trained Horse
• 2 German Allies Trained Infantry
• 2 German Allies Elite Infantry
• 1 German Allies Trained Infantry (attacker's bonus unit)
• 2 Medium Guns
• Nation Advantage: Lethal Volleys
French
• 4 French Trained Infantry
• 2 French Trained Horse
• 2 French Elite Horse
• 3 Medium Guns
• National Advantage: Cavaliers


Stream Crossing: The English left flank advanced towards and over the stream. As infantry, this did not have any impact. The English horse crossed the stream, which would have placed 1 point of disorder on them, but I played the "Find the Way" card and was able to cross the stream without penalty.


Cavalry vs Cavalry: The French horse charged the English horse. As the French national advantage was "Cavaliers," all their cavalry had a +1 combat modifier over the English. The two elite regiments had an additional +2 combat factor over the English horse. It was a bit of a bloodbath, and all the English horse were destroyed in three rounds of combat. However, the French horse regiments were left with 2 or 3 disruptions each.


Cavalry Frontally Charging Formed Infantry: The two elite French horse regiments, charged a single elite English allied infantry regiment but due to the close proximity a second elite infantry regiment  were able to join into the melee.  This  resulted on 2 horse regiments vs 1 infantry and 1 horse regiment vs 2 infantry.  (The Maurice rules handles complex melee very well).   The French horse lost and were driven back and subsequently took even more disruption from infantry volley fire.  However the disruption they placed on the elite infantry was a factor in the elite grenadiers failing in the assault on the village.

Artillery: As a bombardment order takes a full turn, artillery did not feature much in the battle. The English guns bombarded the village and, given enough time, would have worn down the defenders. I suspect that it may be one of the areas that may improve with more practice with the rules.

Infantry vs Buildings: Infantry assaulting buildings receive a -2 modifier. This puts trained infantry defending a village on an equal footing with elite troops performing the assault.  In this battle my elite grenadiers had already been mauled by the French horse and this resulted in them being defeated in their assault of the village.


Infantry vs Infantry: The English infantry advanced across the field and closed in on the French right. Under these rules, when one side volleys, the other returns fire but after the "active" side. The English national advantage of "Lethal Volleys" allowed a re-roll of any hits which fail to cause disruption. This proved to be a significant advantage, allowing the English to win on their left flank but leaving them with considerable disruption. This isn't a game where units which win firefights or melees are untouched and able to roll down the battlefield fresh as a daisy.


Army Morale: The French won this battle as the British army reached its breaking point. Although even if night had fallen first, the French would have won as they held the objective, which was in the village.


Summary
The rules played very quickly and were easy to pick up. My opponent and I both thought that we rather rushed into combat and should have taken more time to manoeuvre more broadly and take time action cards in our hands.